How to allow access to my microphone? (Classic)
MightyCall webphone requires access to your microphone to make and accept calls. If you want to allow access to your microphone every time panel.mightycall.com tries to use it, and you don’t want to be asked again, you should set the privacy settings in order to grant access to your microphone.
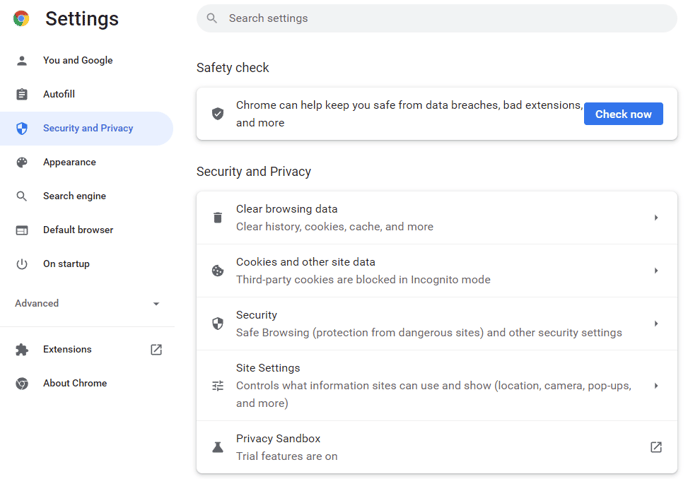
For Google Chrome
- Open Chrome and select the Chrome menu, represented by three vertical dots in the top-right corner.
- Select Settings.
- Under the Security and Privacy section, select Site Settings.
- Select Microphone to access its settings and make sure Sites can ask to use your microphone is turned off. Also, make sure the correct microphone is selected from the interface.
- To finish up with the microphone setup, please navigate to any MightyCall page, click on the padlock button to the left of the address bar and select Allow for the microphone.

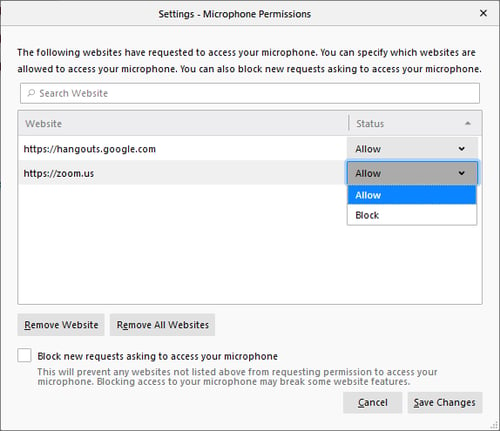
For Mozilla Firefox
- Open Mozilla Firefox, click the burger menu icon in the top right corner of the browser and select Settings.
- Click Privacy & Security from the left menu.
- Scroll down to the Permissions section.
- Click the Settings... button for the Microphone option. Firefox displays the websites with saved Allow or Block permission.
- Use the Allow selector to grant permissions to the MightyCall webphone site. You can remove the site by selecting it from the list and clicking Remove Website.
- Click the Save Changes button.

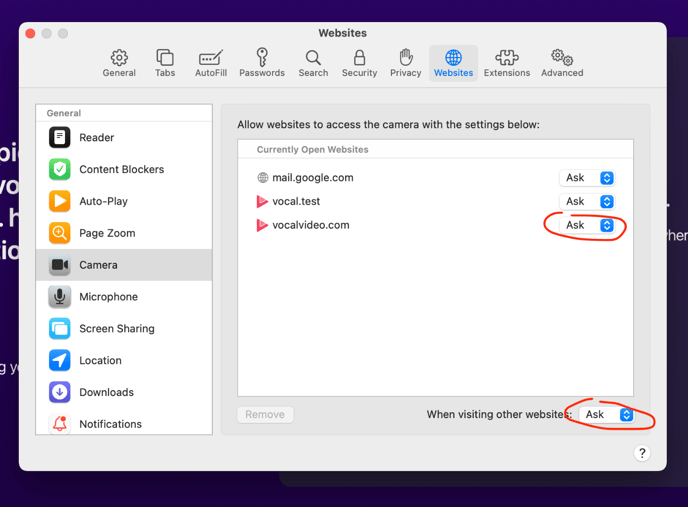
For Safari
- Launch Settings.
- Choose Safari. You'll have to scroll down to find it.
- Go to Preferences and click Website.
- Select Microphone.
- Make sure you have MightyCall webphone site set to Allow instead of Ask.
